
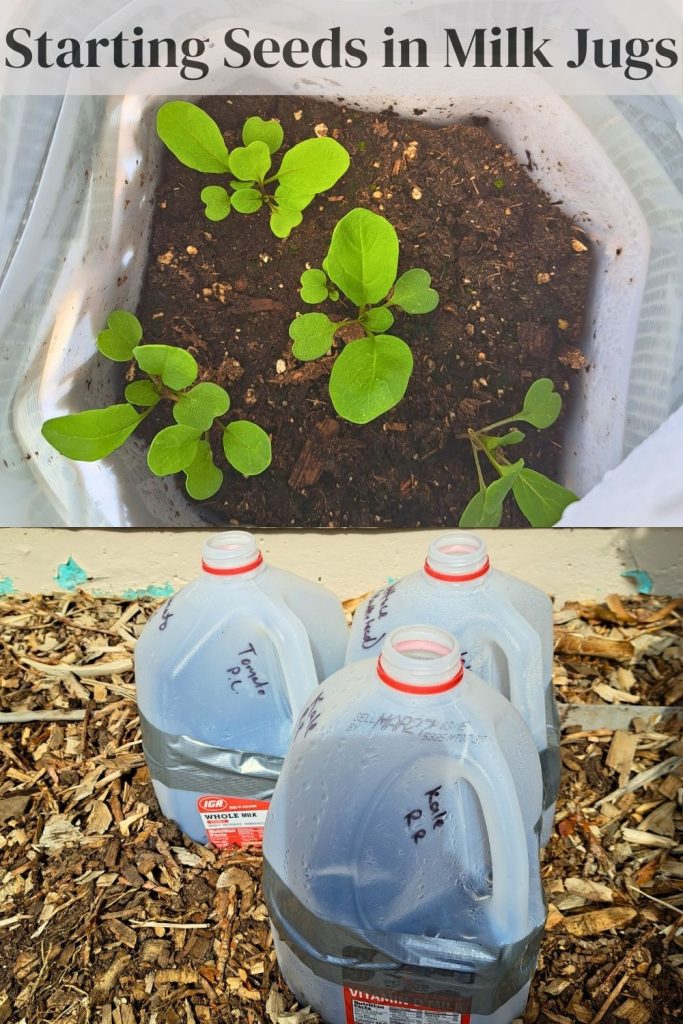
Starting seeds in milk jugs is a practical and economical way to start seeds without a greenhouse. Milk jugs are easy to obtain and create a perfect micro-climate for seeds to germinate when the time is right. Follow these simple steps to kick off your growing season!

At the beginning of March I started to get spring fever. A few days of nice weather had me longing for spring and flowers and gardening, but spring is fickle here in Montana, and I knew that there were still many frosty days ahead of me.
But I couldn’t ignore the siren call of the garden.
This magical idea of “winter sowing” had just come onto my radar along with the idea of using milk jugs as mini-greenhouses for starting seeds. Though I was not actually winter sowing, by starting my seeds in these milk jugs I was able to get my hands into some dirt over a month earlier than otherwise.
I am new to gardening, so I don’t have the equipment to start seeds indoors with seed trays and grow lights. However, I always have access to milk jugs, and I have sunny spots outside where I can set them and forget them. Well, maybe not forget them. It is too exciting to see the seeds start to germinate!

Can I Use Other Containers?
Many products that we purchase every week use plastic packaging: milk, juice, salad mixes, desserts, soda and water. The list is endless! While some people and companies are doing their best to reduce plastic waste, I still acquire much more plastic than I would like. Finding ways to reuse these items is one small step I am taking on the journey toward taking better care of my little part of Earth.
Many of these kinds of plastic containers can be used to start growing seeds at home. To start seeds, the containers should be somewhat see-through, like clear plastic juice bottles and opaque milk jugs (the cloudy kind, not the white ones). They should be at least a few inches in diameter and at least 5 inches deep so there is enough space for both soil and the newly emerging plants to grow up.
Start saving your plastic salad boxes, juice jugs, and even soda and water bottles for single plant starts!
What Equipment Do I Need to Start Seeds in Milk Jugs?
- Milk jugs, or other clear plastic containers
- Potting mix
- Seeds
- Small knife, screw driver, or drill (to make drainage holes)
- Scissors or knife (to cut jug mostly in half)
- Duct tape
- Permanent marker or plant label

Best Plants to Start in Milk Jugs and When to Start Them
You can start vegetables, perennial and annual flowers, even herbs all in milk jugs!
Vegetables
For vegetables, your best place to start is with cold-hardy crops like brassicas (broccoli, cauliflower, kale, and cabbage, etc.), greens like spinach, chard, lettuce, and Asian greens. These cold-hardy crops could be started in milk jugs as early as the winter solstice in late December when daylight hours begin to lengthen again, but most people start in the new year. I started in March, and I did not have to wait long to see my little seeds germinate.
Other warm-season crops like squashes and melons (I know, technically fruits) have a better chance of success when started later, like in March or April.
Tomatoes and peppers are true heat loving plants, so even in milk jug mini-greenhouses, they will be most successful when night-time temperatures are over 50°F and daytime temps are higher. Sadly, where I am in Montana, that doesn’t happen until May.
Flowers and Herbs
Perennial and annual flowers can both be started in milk jugs, but not at the same time. Perennials flowers and herbs are typically more cold-tolerant and can be planted earlier in the spring. In zone 4, where I am, I would start them in March. I would wait until April to start annual flowers and herbs.
Problems with Starting Seeds in Milk Jugs
Sowing seeds in milk jugs is a great way to get a jump on your growing season without the expense and hassle of grow lights, seed trays, etc., but this method is not completely fool-proof. Potential problems include:
- Planting the wrong kinds of seeds at the wrong time. Tomatoes and Peppers can’t germinate if day or nighttime temperature is under 50º, or if they have germinated, they may freeze if the temperature dips.
- Plants can get too hot and burn on warm, sunny days. Make sure to open up the jugs on these days to allow for ventilation.
- Seeds can rot without proper drainage. Remember to make drainage holes!
- Plants may dry out. Keep an eye out for condensation inside the milk jugs. Keep them where they can get access to rain, or water them when needed.
- Having plastic containers outside can look a little tacky. Setting them in a semi-covered space can protect your street views. I set mine in a garden bed behind a slightly raised edge, and most people walking by don’t even notice the milk jugs.
Like any gardening endeavor, starting seeds in milk jugs is a learning process. Try something and take notes on what works and what doesn’t. Try starting the same kind of seeds at different intervals and record what dates work best for your area. While we don’t want to be wasteful, this kind of inexpensive experimentation will be well worth it for years to come.
How To Start Seeds in Milk Jugs
- Clean milk jugs
- Create drainage holes
- Cut milk jugs mostly in half
- Add moist potting mix
- Plant seeds
- Label plant
- Seal milk jugs
- Place milk jugs in a sunny location (safe from wind!)
1. Clean milk jugs
Rinse milk jugs with water, and discard lids. You don’t want to have sour milk smells as the weather warms.

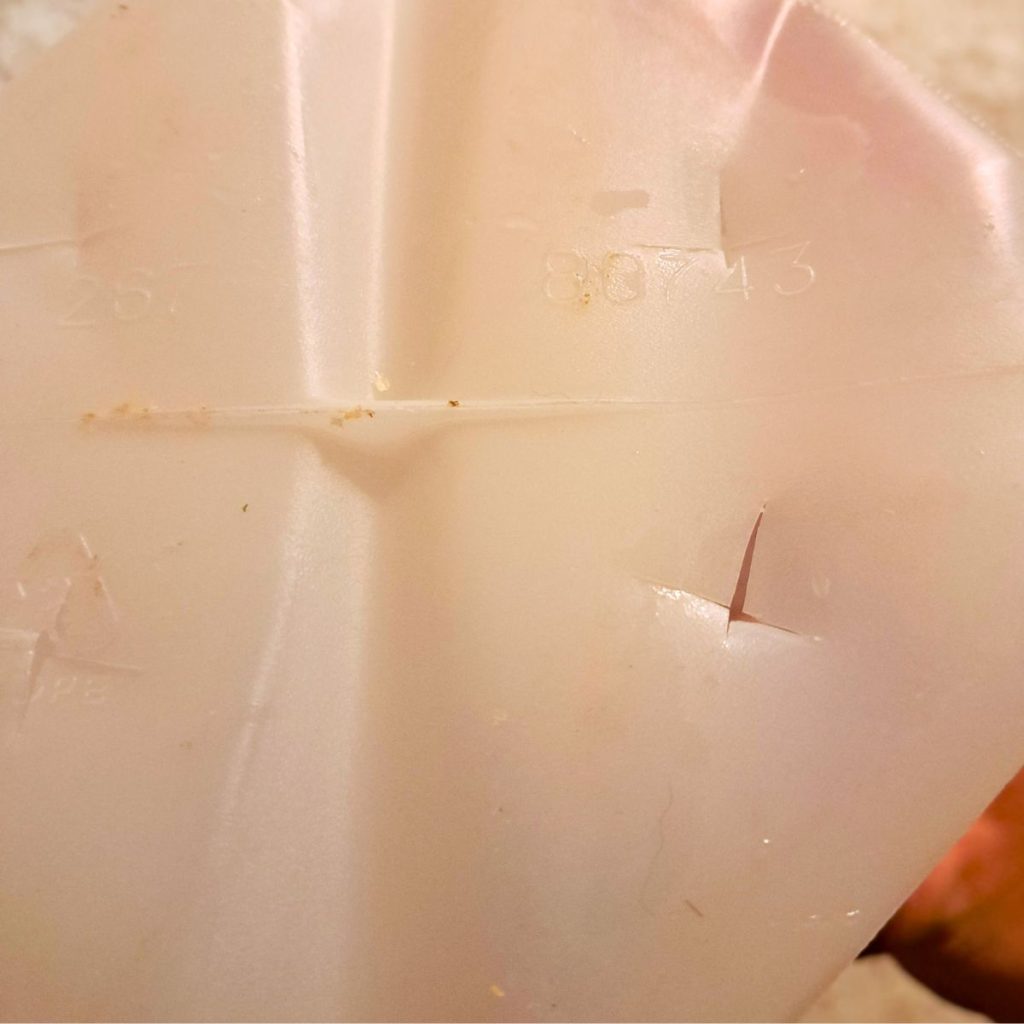
2. Create drainage holes
Make several holes on the bottom and around the base of your jug. I used my trusty Pampered Chef paring knife and made “x” shaped cuts on the bottom and simple slashes around the outside base.
You could also use a drill, or warm up the end of a Phillips-head screw driver to poke holes in the plastic.
3. Cut milk jugs mostly in half
At about the base of the handle, cut the milk jug mostly in half, leaving about 1-2 inches uncut under the handle to create a hinge.

4. Add moist potting mix
Add about 4 inches of moist potting mix (NOT seed starting mix) to the milk jugs. Use potting mix instead of seed starting mix, because your plants will need more nutrition than seed mixes offer. The seedlings stay in the milk jugs longer than in traditional seed starting trays.
If you are making your own potting mix and need to purchase a lot of compost, check out this post!
Make sure the potting mix is moist, but not soggy. Consider spraying the top with water until the top inch of soil is slightly damp.
5. Plant seeds
Follow the recommended planting depth on the seed packet. I made 5 holes for most of my holes, one in each corner and one in the center. Then I placed 2 seeds in hole and covered them and gave the whole thing a final light watering.
I love that the seed packets from Botanical Interests have clear instructions, and more information about the plants on the inside!
6. Label plants
Remember to label your plants! You can put a plant label inside your milk jug, or write it on the outside of the jug or on a piece of tape. If you write it on the outside of the jug with a Sharpie, it may fade from the elements, so keep an eye on it.
7. Seal milk jugs
Seal the milk jugs with duct tape. This allows the jugs to retain the condensation, so they maintain the necessary moisture levels and don’t dry out too quickly.

7. Place milk jugs in a sunny location
Now it is time to place the milk jugs in a sunny location, but take care that they are safe from wind. If they blow over, the seeds you carefully planted will be displaced and likely buried too deeply for germination.
I buried my milk jugs in about 2-3 inches of woodchip mulch. They stayed in place until I was ready to transplant… or when my toddler started “helping.”
Now it is time to get your hands dirty and start seeds in milk jugs! Happy gardening, Friends.
Pin It for Later!
Leave a Reply